Linux x64 VM on an M1 Macbook
I upgraded to the M1 MacBook Pro as my daily driver laptop about a year ago. Being a machine with the ARM architecture, I couldn’t use the same setup that I had on my previous machine, an Intel machine. I tried a bunch of solutions before finally settling on the current one, which I’ll describe in detail in this post.
Initial trial and error
I started off with a free trial of Parallels Desktop, which at the time (2021) provided support for M1 Macs over VMWare, which is what I used on my previous laptop. After the trial got over, I was looking for a more permanent solution. VMWare did release a version of their app for M1 soon enough, but that too seemed buggy at times.
Enter UTM, a free and open-source alternative to Parallels and VMWare for MacOS. Setting up the VM using it was a breeze due to the installation instructions as part of their documentation. I used a Kali Linux ARM VM on UTM for a long time, till I started noticing some core issues.
Core issues
One of the them was not being able to run Linux x64 (x86-64) binaries. Oftentimes for Reverse Engineering challenges as part of CTFs, we were provided with an executable, which were created on and for the x64 architecture. Using virtualization tools (like Parallels and VMWare) meant that I could only set up an ARM VM on an ARM machine, so this stayed an issue regardless of the tool I used.
The main solution was emulation, i.e., running a different architecture than the host system’s architecture. I tried emulation in two ways:
-
Karton is a tool to run Linux programs on macOS, a different Linux distro, or a different architecture, with Docker as its base. This worked fine but having a VM for most tasks and a docker container just to run x64 binaries felt too much.
-
UTM runs QEMU under the hood, which provides support for Emulation. I tried setting up and running a x64 VM, but it ran extremely slowly.
The other issue was that some software wouldn’t install due to certain dependencies not providing support for ARM machines (at least at the time).
Additionally, I had some tools installed on the Mac since they worked better there, so working between two different GUIs was getting a little annoying, and the VM took up a lot of space because of the GUI. This struck an idea, which led to the current setup.
Setup Overview
-
Terminal-only VM: From the emulation attempts, I realized that what made emulated VMs really slow was the GUI, as Karton didn’t have any speed issues but the emulated VM did. I figured that having a GUI on the VM was not necessary, as most of my work was done in the terminal.
-
Emulated VLAN: This part is specific for situations that require connecting to a VPN, as is my case with Hack The Box machines. I needed to use both the host and the VM for different parts of the challenge. I could only connect the VPN on one place at a time, so that meant changing the connection between the two. This got extremely annoying, and Emulated VLAN, a network mode in UTM was the solution.
-
Remote access via SSH: With the GUI gone, the suggested settings for file and clipboard sharing between the host and virtual machine didn’t work. This was solved by accessing the VM using SSH and Port Forwarding as part of Emulated VLAN.
Terminal-only VM
This step requires downloading UTM and the 64-bit installer from the Kali Linux website. The setup for this VM is the same as a usual setup except for a few changes.
When creating a new VM, select Emulate instead of Virtualize. Most of the settings are set properly by default, so the rest of the setup continues as usual.
During the Kali Linux installation process, deselect the default desktop envrionment (Xfce) in the Software selection section. Since no GUI is selected, this should lead to a terminal-only installation.

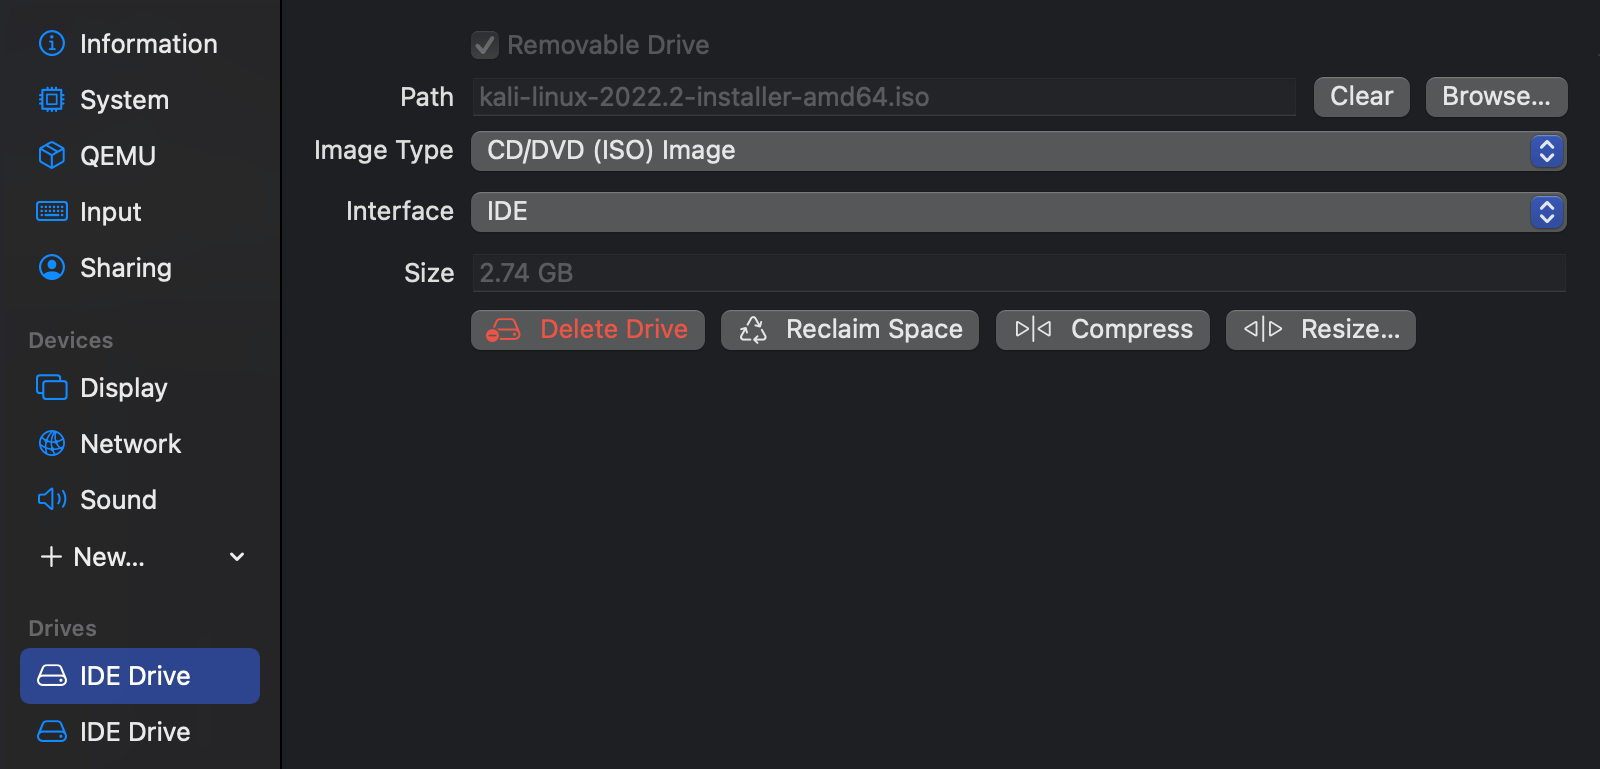
Once the installation is complete, the VM reboots and you may see the installation screen again. To fix this, switch off the VM and open the Settings page. Under the Drives section, remove the installer Drive, which has the type CD/DVD (ISO Image). The VM should boot fine from here.
Emulated VLAN
Emulated VLAN is one of the different networking modes on UTM, which are described here. The reason why this mode allows VPN connections to go through over the other modes is described by one of the UTM devs in a GitHub issue:
Have you tried the emulated VLAN network mode? If any, that one would definitely go through the VPN since it’s emulated in userspace. The other modes use macOS Virtualization features that might not respect the host’s VPN settings.
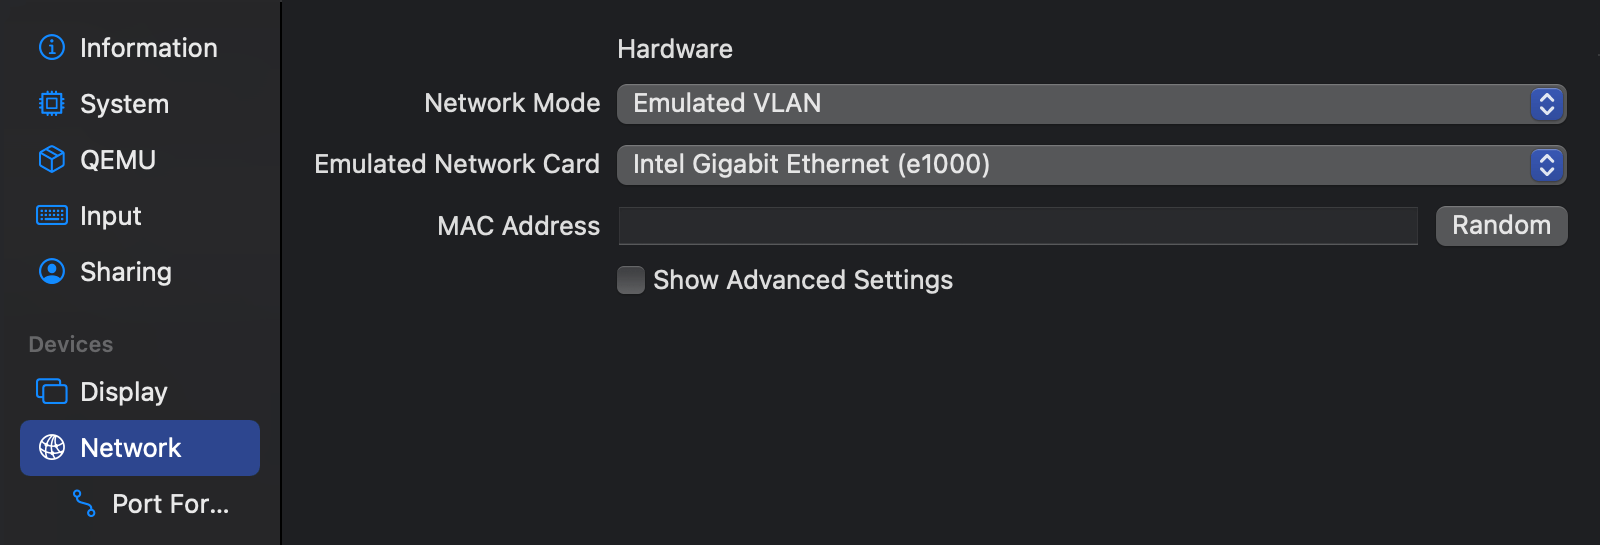
Open the settings page of the virtual machine, click on Network and change the network mode to Emulated VLAN.
To be able to access this machine remotely, port forwarding needs to be set, which is covered in the next step.
Remote access via SSH
With the Emulated VLAN mode, we’re now dealing with two separate networks - your local network containing the host machine (192.168.0.X range) and the Virtual LAN containing the VM (10.0.2.X range). To access services on the VM from the host machine, we need to map required ports of the VM to ports on the host machine.
This technique is called port forwarding. One such service is ssh at port 22, which we can use to access the machine on the host’s terminal.
Port Forwarding
After changing the network mode in the previous step, a new section called Port Forwarding should appear in the sidebar. Click on New button in the Port Forwarding section, and forward port 22 on the guest machine to port 2200 on the host machine. The IP address fields are left blank, so that the defaults are applied.1

You can add additional ports to transfer files between the host and VM or as ports to listen for incoming reverse shells. I added 3 additional ports - 1234, 4444 and 8888).
Start SSH server
Save the settings and start up the VM. Once logged in, start the ssh server. If ssh is not installed, install it first.
$ sudo apt install openssh-server
$ sudo systemctl start ssh.service
If you prefer that ssh is enabled by default each time the VM starts, use the following command after installation:
$ sudo systemctl enable ssh.service
Once started, open a terminal on the host machine and log in with the credentials you’ve set, 127.0.0.1 as the IP and 2200 as the port number.
$ ssh pjg1@127.0.0.1 -p 2200
Now that your VM is accessible on the host, copy and pasting text should be the same as always. The process to transfer files is a little longer.
File Transfer - Host to VM
First, start a server using Python on the host machine.
$ python3 -m http.server
Serving HTTP on :: port 8000 (http://[::]:8000/) ...
Then on the virtual machine, retrieve the file of choice using wget and the IP address of the host machine, generally seen in the en0 interface.
$ wget http://$IP:8000/$FILE
File Transfer - VM to Host
First, start a server using Python on the virtual machine, using any of the port forwarded ports.
$ python3 -m http.server 8888
Serving HTTP on :: port 8888 (http://[::]:8888/) ...
Then on the host machine, retrieve the file of choice using wget and 127.0.0.1 as the IP address.
$ wget http://127.0.0.1:8888/$FILE
I currently use these steps with iTerm2 as the terminal. Another option is the remote-ssh extension, if you’re a VSCode user.
With all of that, you’re good to go!
-
The UTM UI has been updated with their recent release. When setting a port forward in the earlier UI, each text field had a label next to it, making it clear which is which. Now for some reason, the labels have been removed, but the order is the same. ↩︎